With millions in cryptocurrency stolen every year, having an extra layer of security is essential these days. A simple way to do so would be acquiring a hardware device such as the Ledger or Trezor wallets and keeping your private keys safe.
While this tutorial was done using a Ledger Nano X, most hardware wallets are set up similarly and the steps should still be applicable.
Before starting
It is very important to get your hardware device from the actual site and not a secondary market. When your device arrives, you should check if the box looks like it has been tampered with before opening it.
Before doing anything, I would suggest downloading ledger live and grabbing a pen for your seed phrase. You will need about 30 minutes for the whole set up
Setting up your Ledger Nano X
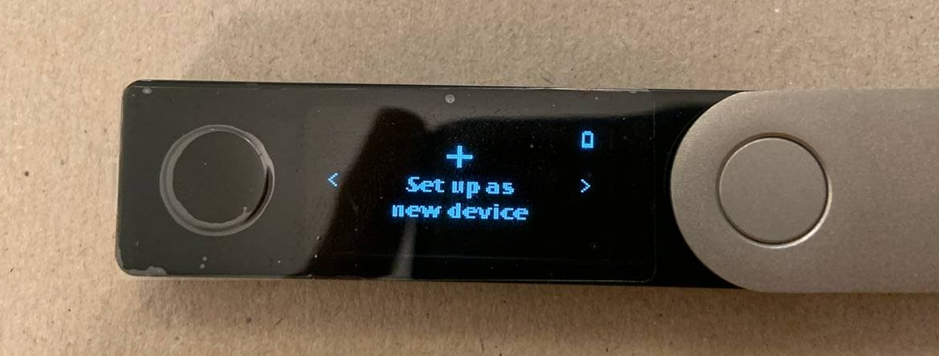
First, turn your device on and navigate using the left and right buttons till you get to the “set up as new device” and press both simultaneously to choose your pin.
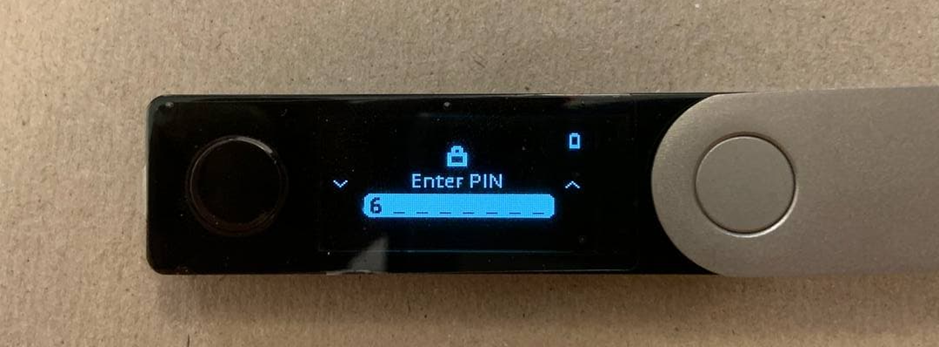
Then, choose a pin code, using the left and right buttons to change the numbers and both buttons to confirm. Take note that your pin code can be anywhere from 4-8 digits long and you do not have to fill all the blanks.
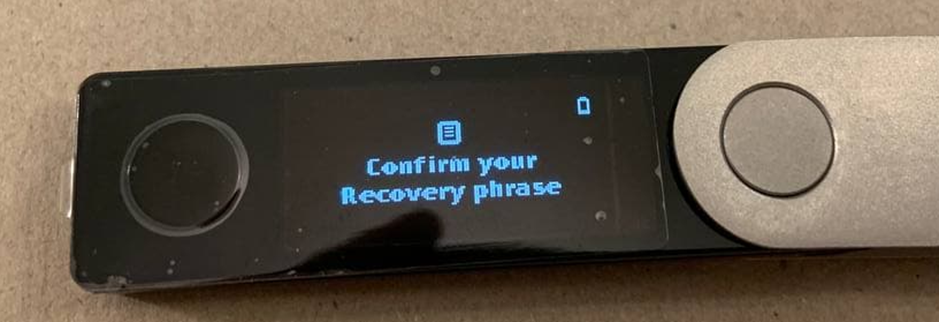
You will have to take down your 24-word recovery phrase. All Ledger devices come with helpful cards to write them down. Confirm your recovery phrase by re-entering them one by one.
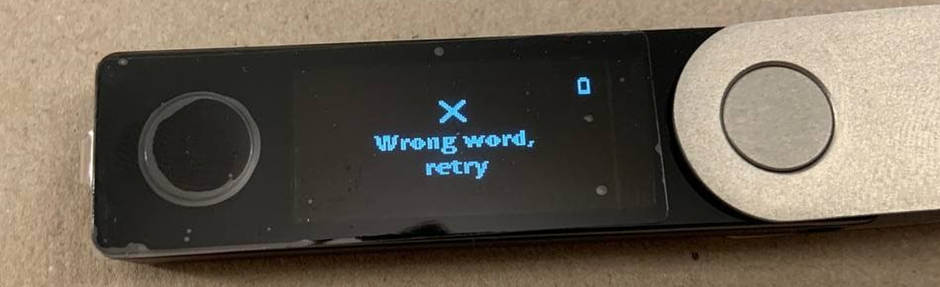
If you get a word wrong, you only have two retries before having to restart the process.
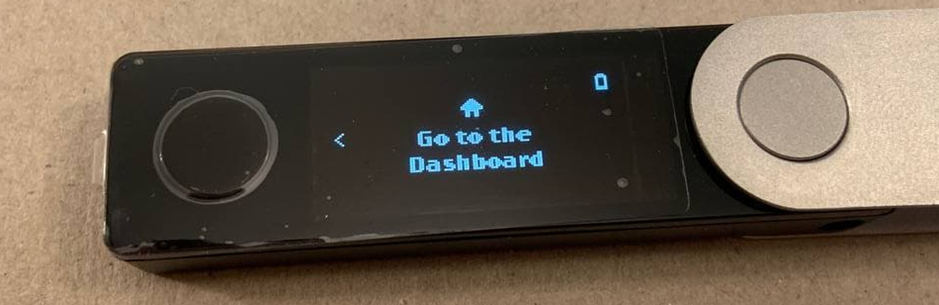
If you have done everything correctly, you should be at this screen, where you can now freely navigate around.
Setting up Ledger Live
Once done, open Ledger Live and connect your hardware wallet to your computer with the given USB cable.
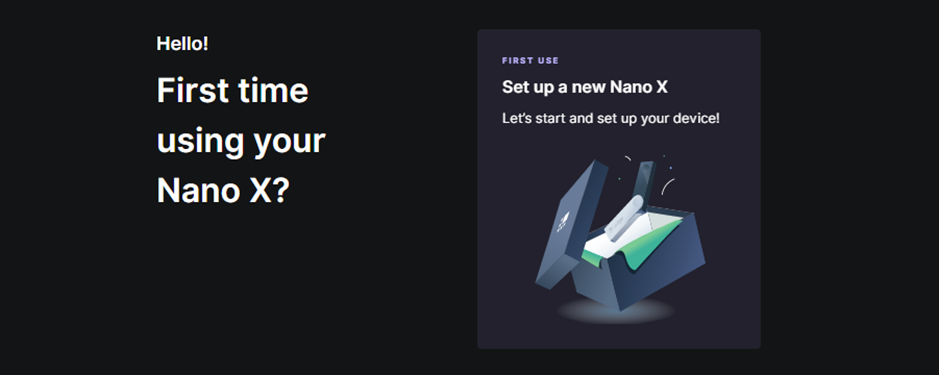
Navigate to the above page and select the first-time option.
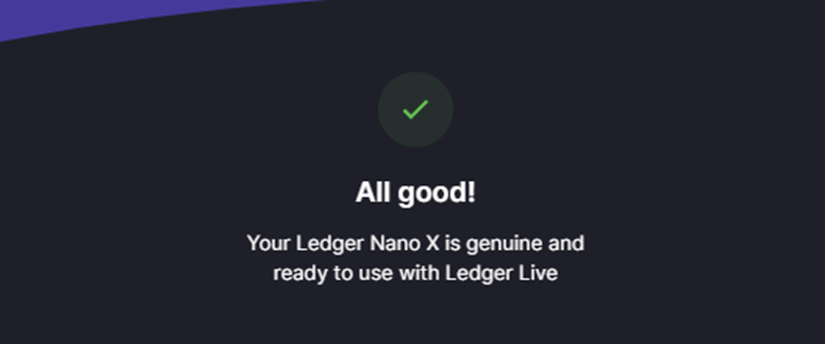
After a short quiz and verifying your hardware device, you should arrive at this page. Congratulations! You have successfully set up your first cold wallet!
Using your cold wallet

In Ledger Live, navigate to “manager” and install the Ethereum application.
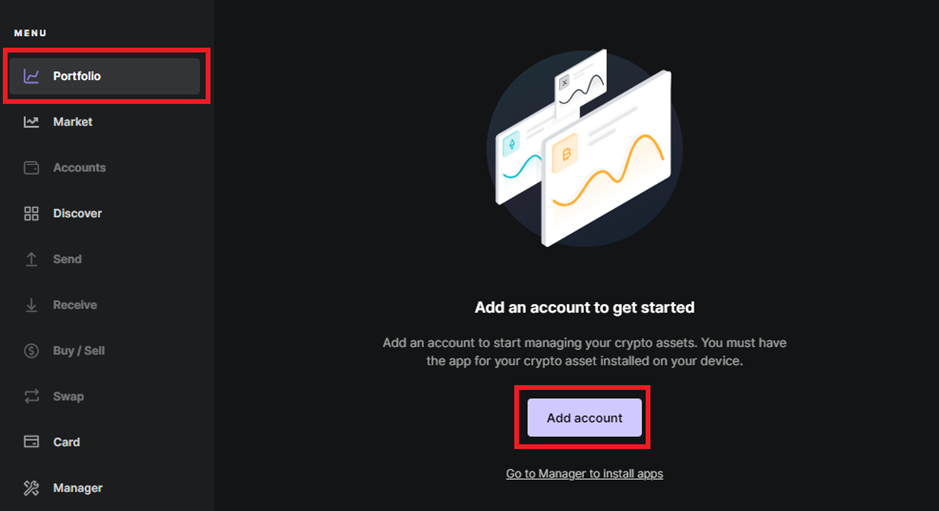
Then, go to “portfolio”, click add account and add Ethereum, verifying on your ledger device. The same can be done with other networks.
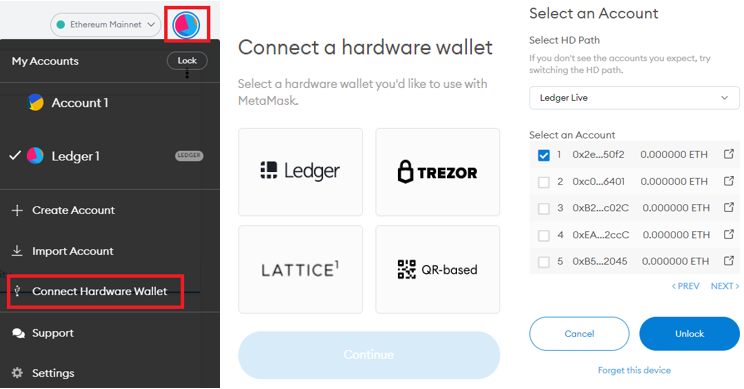
Open MetaMask, select connect hardware wallet and pick Ledger. It will show you a list of wallets which may be confusing at first, but they are just the wallets within your device. Simply elect one and press unlock.
Now, you can use metamask as per normal but every transaction out of your ledger wallets requires your approval on the cold wallet.
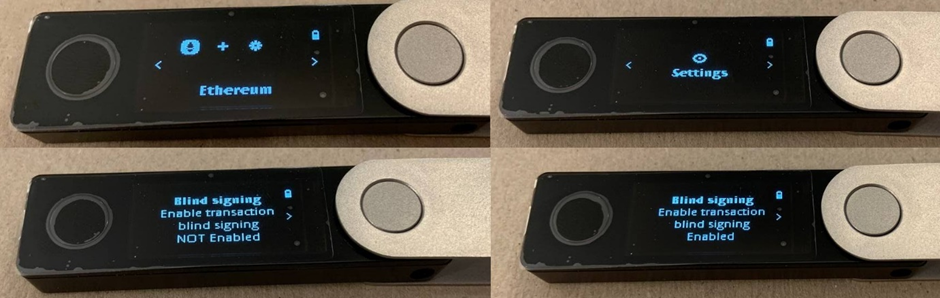
If you are having trouble interacting with smart contracts, in your device go to Ethereum -> Settings ->Blind Signing and enable it by pressing both buttons.
Are cold wallets worth it?
Honestly, the first time setting up my ledger device was such a hassle that I swore never to use it again. However, with stories of NFTs being stolen and seed phrases being phished becoming commonplace, I dug up my ledger and used it to store the bulk of my crypto, using other Metamask accounts for daily transactions.
While it may be a hassle at first, storing coins I intend to hold long term into cold storage and not having to worry about them is absolutely worth it.
Featured Image Credit: The Verge
Also Read: Hot Vs. Cold Wallets: Key Differences, And Why It’s Important To Own A Cold Wallet