As we usher in an era of decentralized finance (DeFi), we are seeing thousands of decentralized applications (dApps) being built and released.
The beauty of DeFi and dApps is that there is no single entity that is governing and controlling the project or protocol. However, due to its decentralised nature, it can be hard for users to use these applications.
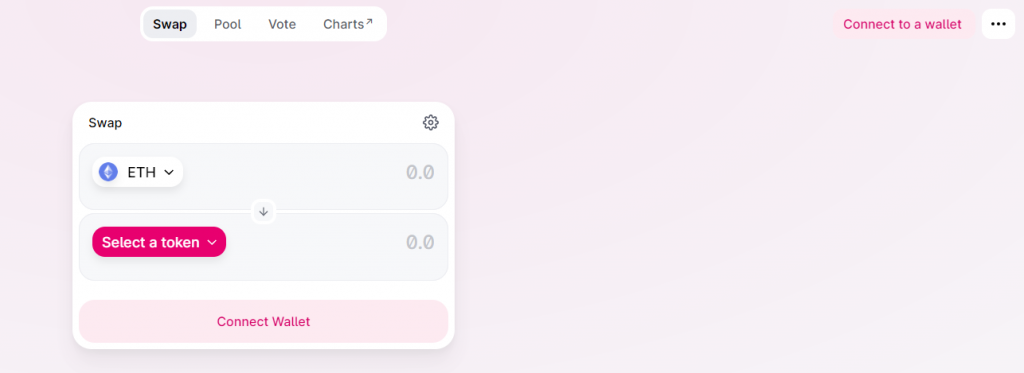
For example, if you are looking to swap your ETH to another BTC, you have to use a decentralized exchange such as Uniswap. Decentralized applications are easily identified with the “Connect Wallet” button on the top right side of the web page.

The main way to interact with these decentralized applications or exchanges is via a digital wallet, with MetaMask being the most popular option.
What is MetaMask?
MetaMask is available as browser extension and as a mobile app, and acts as an Ethereum wallet. It is installed like any regular plugin.
Once it is installed, you can store Ethereum and other ERC-20 tokens, allowing you to make transactions to any Ethereum address. You can now interact with thousands of dApps available on the internet. The benefit is that this avoids you having to run all the Ethereum software yourselves, as MetaMask runs that for you on their servers.
To have an MetaMask account, you can just download the plugin like any other browser plugin you download onto your Google Chrome browser. Upon a successful installaton of the plugin, you will be able to see the MetaMask plugin on your browser tab.

Be sure to create a strong password and store your seed phrase somewhere safe and secure.
How To Use MetaMask
Once you have installed MetaMask, you just need to follow the onscreen instructions to sign up for the account. Here are some basic set by step:
1. Install MetaMask.
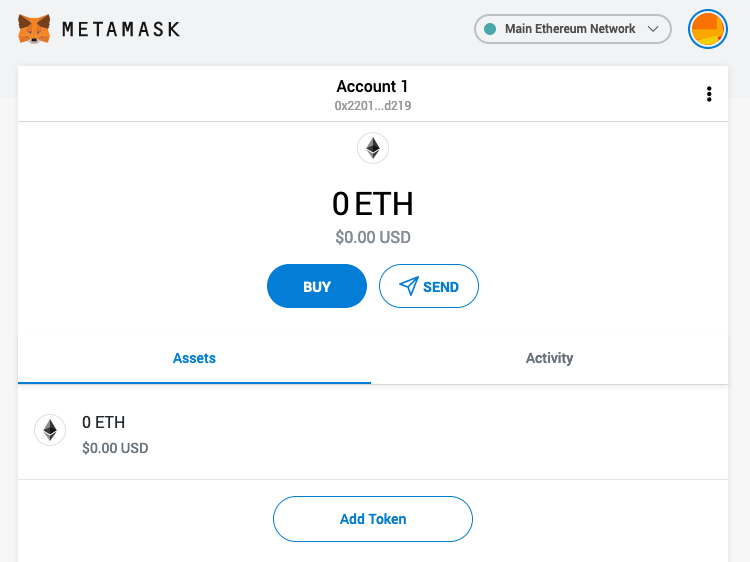
Go to metamask.io and select “get Chrome extension”. A default account with an associated public Ethereum address will be created on the Main Network. Your Metamask Ethereum address can be found on the main screen and it usually starts with 0x.
2. Send some Ether to MetaMask.
Your Metamask is an empty wallet when you sign up. To use it, you need to fund it with some crypto.
To do this, you can go to your Binance or Coinbase account and send your crypto to the address associated with your MetaMask.
o get your public address that was automatically created when you created your MetaMask vault, click the “…” icon and click “copy address to clipboard.” That will copy your address to your clipboard so you can paste it. You can try to send a minimum amount first to familiarize yourself with the transfer process.
3. Visit a decentralized application
Each site designed to interface with Ethereum is going to preform a different function. For this example, we’ll use Uniswap.
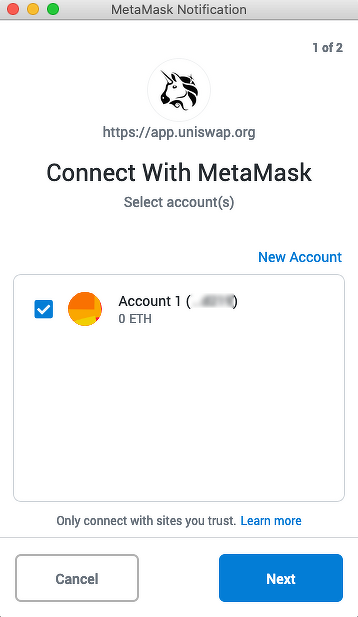

Notice how at this point the site has grabbed some information from your MetaMask wallet (in this case, your public address)? This is because MetaMask and the Ethereum-based web app are talking to each other. Continue to follow the directions for signing in.
4. Confirm your sign in
Click “sign in” and you are now logged for real and ready to purchase. This works just like it would on any other website, click the product, click the buy now button, confirm the transaction. The only note is that your final confirmation will be in MetaMask (you’ll see a screen that confirms details like fees).
6. Receive your purchase
Once the transaction is confirmed, your address will be associated with the token you just bought. If you bought a kitty, it is associated with a non-fungible ERC721 token (which represents a cat which you can view/sell on the site).
If you bought a cryptocurrency, you will see the balance of the cryptocurrency in your metamask wallet. If you bought NFT via your MetaMask, the NFT will be tied to your MetaMask wallet address on the blockchain. Essentially, once your transaction is recorded on the blockchain, you own whatever it is you bought.
Is MetaMask safe?
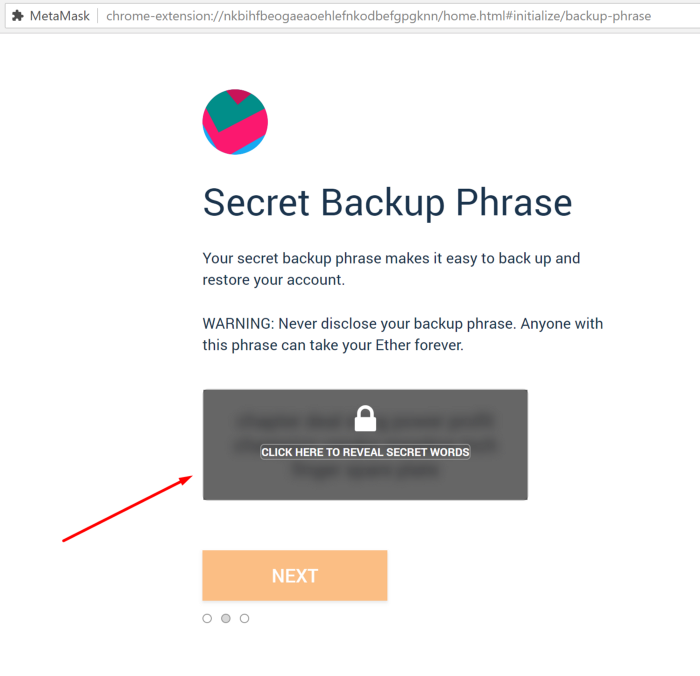
When you create a Metamask wallet, you are given your 12-word Secret Recovery Phrase.
Metamask does not control any of your personal or private data on our servers. Everything is encrypted in your browser and protected via your Metamask password. So, when you lose your Metamask accounts, and need to restore Metamask, you can only do that with your Secret Recovery Phrase.
Metamask is also considered a “hot” wallet, in that you use it on a computer connected to the internet. This is usually considered less secure, because if a machine is on the internet, it could be accessed remotely, and keys could be stolen.
However, Metamask always stores your seed phrase encrypted with your password, so an attacker would need both your password and your seed phrase to use your account.
It is therefore recommended to store your seed phrase offline as much as possible or you can transfer your crypto to a cold wallet.
Owning a MetaMask is the absolute first step to the world of decentralized finance. Drop us a comment below if you need any further clarifications or assistance.
Also Read: How To Get Started With Decentralised Finance (DeFi) For Beginners